SlideMagic Blog

Frequent updates about all things presentations since 2008. Subscribe to never miss a post.

RSS
all posts

Search results for “compress image”

·Images

Compressing images in PowerPoint

PowerPoint files with images can get very large. As soon as a file exceeds 10MB, it becomes difficult to collaborate on it via email. This probably one of the main reasons office collaboration will ultimately go into the cloud, but before that time arrives we need to deal with the current situation.

You can find the standard compression options in the format menu after you have clicked an image. Sometimes, more brutal force is required though. Somehow, if you right click an image in PowerPoint, save it is a JPG, delete it, and then copy paste it back in, the files size has shrunk a lot.

In the heat of CTRL-C, CTRL-V work, PowerPoint sometimes puts in images as bitmaps or PNG files that take up a lot of space. This trick trims them down again.

Be aware that compressing files hurts the quality of the images. So if this is a presentation destined for a huge screen at an important conference, keep the original photos somewhere in a safe place in order to be able to re-construct the full size version once you have agreed on the final document with your team.
·Design

How to scale an image to full-size in PowerPoint

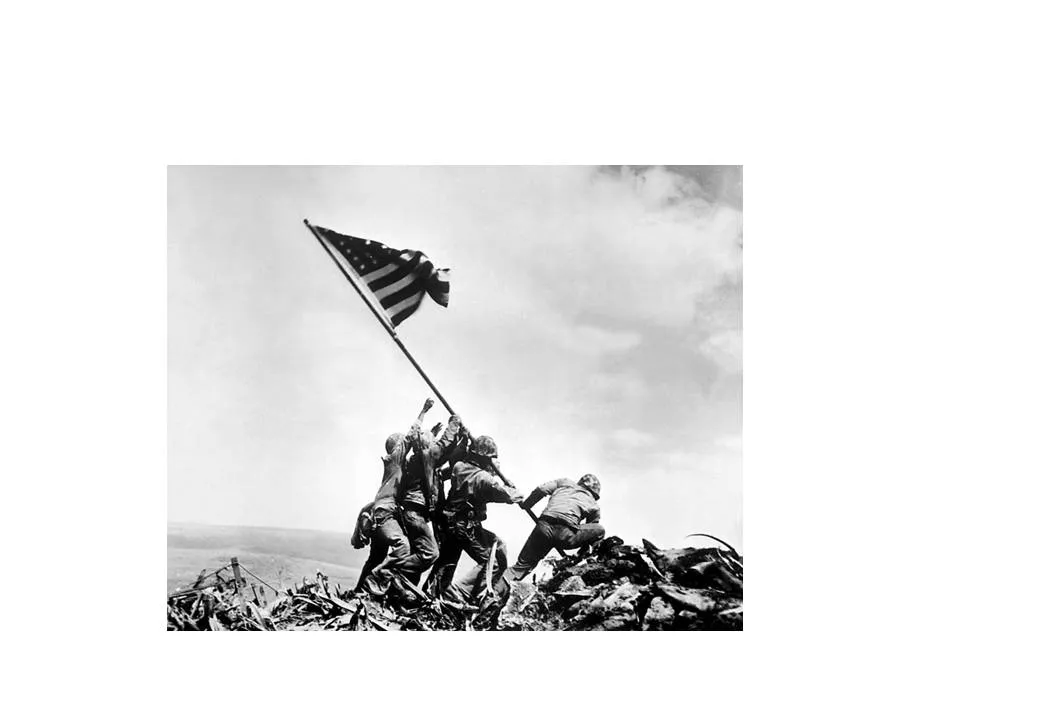
Most people have now caught on to the idea of using large images in presentations. But with a few graphics design tricks you can make things look even better:

  • Make sure that they are not stretched or squeezed: the proportions between height and width are the same as in the original
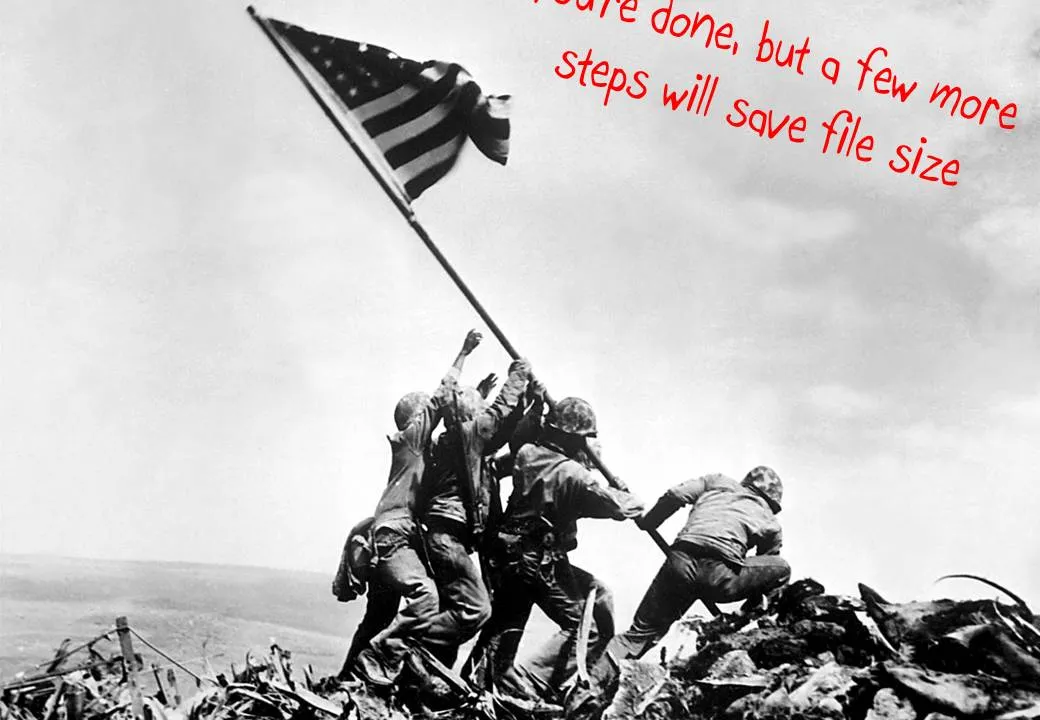
  • If the image is big, go all the way and have it cover your entire slide.

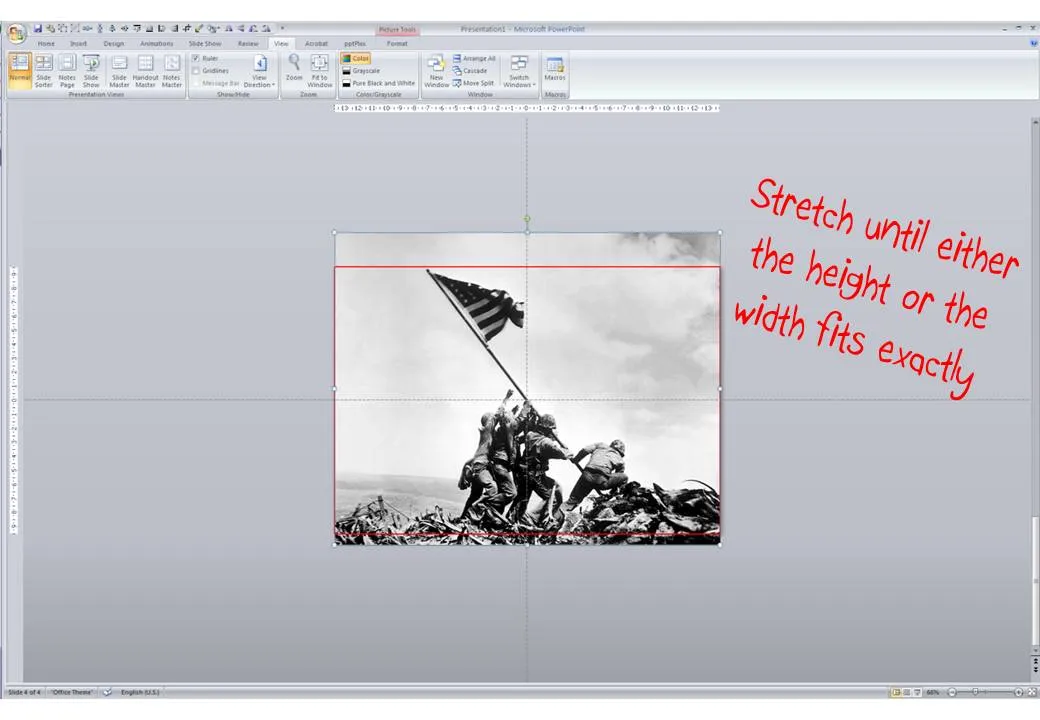
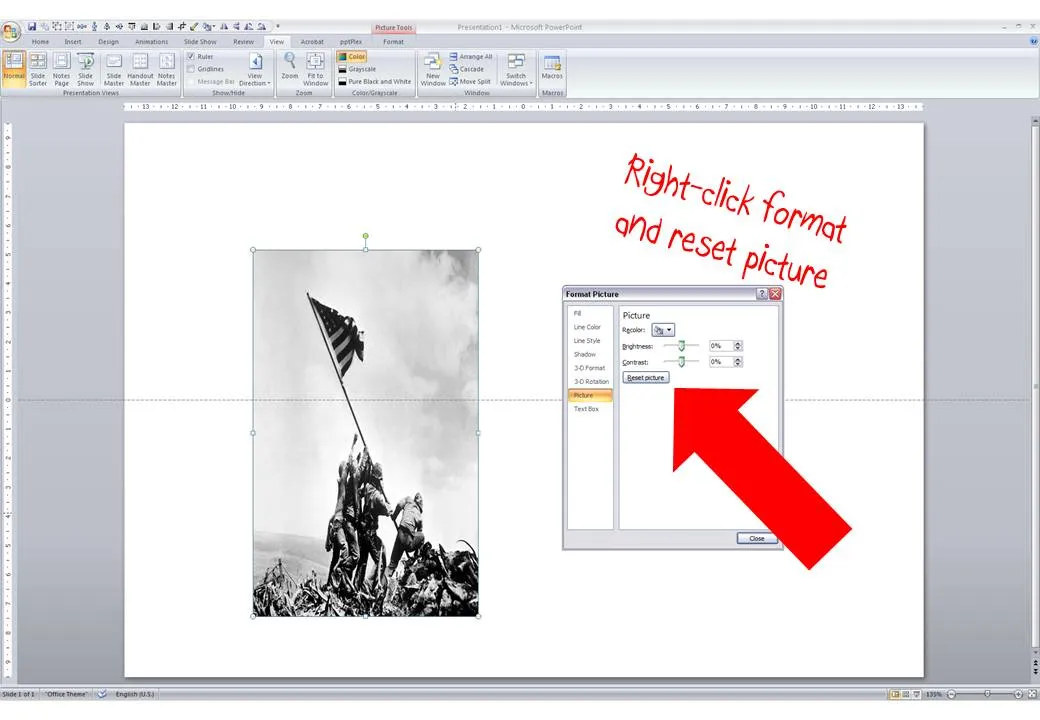
Here is how to do it:

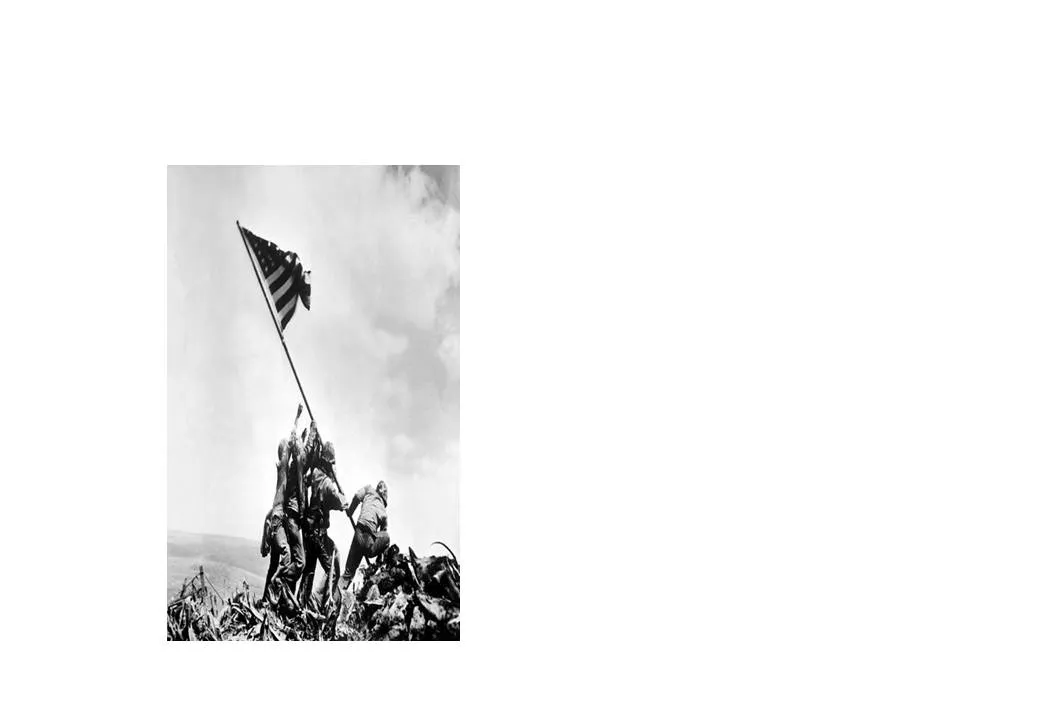
  1. Right-click the image, select format picture and click “reset picture” to restore the original aspect ratio (between height and width)
  2. Re-size by dragging a corner until both the height or the width are at least equal to the full screen
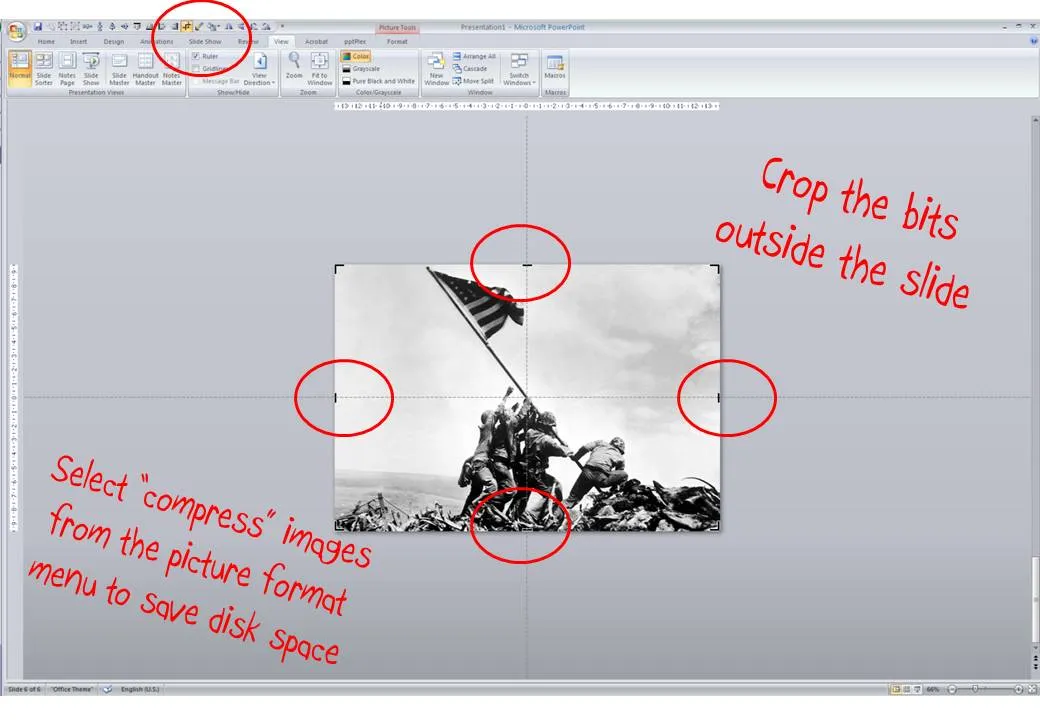
  3. Reposition the image and crop the bits of the image that are sticking outside the canvas
  4. Select the image, press format and compress pictures to reduce the file size of your presentation

Image housekeeping

In the heat of the presentation design process, you can easily forget some basic image house keeping. You search Flickr for a Creative Commons image, find it, CMD-C/CMD-V into PowerPoint, go back to find the name of photographer and put it in small letters on the PowerPoint slide. Done. What next? PowerPoint reduces the resolution of the image to 72 DPI, and crops off the bits you do not use (if you compress files). Also, inside a PowerPoint file, it is much harder to find that image when you want to use it later. So instead: save your file to disk with a good description, including the name of the photographer. If you want, you can add meta data in workflow applications such as Aperture. In this way, you are building on a useful photo library for the future.

JPEGmini compresses file size not quality

JPEGmini has a new technology to compress the sizes of JPG files dramatically without quality loss. I took it for a test drive in snow-covered Amsterdam. My file was reduced from 2.4MB to 0.4MB and only by zooming into the image (click on the second image) you can see a slight, but only slight loss of brightness (can you tell which one is the original?). A pretty impressive result. The question is whether the JPEGmini offering will stay free, and whether will get used to adding another step to an already complex image processing workflow (find image, save it with key words, crop/extend for presentation, adjust dimensions, save Photoshop file, save for web, drag into presentation).

·Colors

SlideMagic slide search results now in colour

Another day, another improvement

I stuck to showing images on slide search results in black and white because I would be sure that the photos would not clash with the accent colour for the slide users had picked (most users will swap SlideMagic blue for their own logo colour). That worked, but it came at a price: slide templates all looked a bit sad. This is not only due to the greyscale colours, but also because of the way the greyscale filter was applied: many colours were translated into too dark tints of grey I think.

This morning I re-rendered the entire slide database (the server is still a bit tired) and images in slide templates now show up in colour.

It is worth the trade-off I think. Of course it is possible to go back to a black and white image in the SlideMagic app, simple untick the ‘colour’ box and the image will show up as grey scale (you can always go back to colour if you want).

The colour option is only available for the slides that I added more recently, after I switched off the colour option when ‘flattening’ or compressing slides. Obviously new templates will all appear in colour, or I will set them explicitly to black and white when I feel that it serves the slide’s message better.

This addition of colour coincides nicely with the more mature SlideMagic product I think, slowly but certainly it comes out in its full shiny colours :-)

Continue reading →
·PowerPoint

Size creep

Super high resolution images of small slide elements can inflate the size of your PowerPoint or Keynote file without you noticing. A common culprit is an innocent looking page with 30 customer logos. Compress your images often to keep file sizes in check.

Another common file size mistake is to include high resolution images in the slide master to make it easer for people to understand template slides that are meant for photos. As a result, even a simple text slide will create a huge file as the slide master gets saved as an integral part of the document. This can add up in a company with 10,000 employees.

Image compression in PowerPoint can sometimes produce unpredictable results, especially when you tick “apply to all” and you have a presentation with a lot of photographs. I often see cropped images going haywire, the only rescue is to compress images one by one. Always save a copy of your file before attempting to compress the file.

Handy link: how to reduce file sizes in Office

Image via WikiPedia

·Images

Hidden space wasters

File sizes in PowerPoint can quickly mushroom. We discussed PDF-ing and/or image compressing before to get the size of your files down.

But here are 2 additional inflators of file sizes that these techniques might not catch. The first one is logos. In order to get the sharpest logo images, you need to search for large logo images. So a typical logo page with 20 or so logos can become a huge consumer of space. But the resulting logo images are actually not that big, you can compress them further (to 96 dpi) than the other, larger images in your presentation. Make sure you uncheck the apply-to-all-images-in-this-presentation box when doing this.

Another space waster is your template. If you were guilty of Frankensteining a deck together from multiple presentations, changes are that your slide master contains duplicate copies of slide masters. Especially title pages with big images can add up. Go through your slides and the slide master to clean things up.

·Design

Picking the correct logo

Many investor and sales presentations include logo pages. Improve the quality of these slides significantly by not picking the first image that pops up in Google image search:

  1. Visit the company’s web site to see what the latest logo of the company in question is, logos get updated frequently
  2. Set the Google image search options to large format
  3. Pick a correct, huge logo
  4. Paste it in your presentation, reduce to the correct size, hit compress images

Companies with a good PR department have high-resolution images of their logos on the web site. Use them.

·Images

Managing big PowerPoint files

Increasing use of images creates very large PowerPoint files. Many web hosters cap the size of e-mail attachments at around 10MB, a limit that is now very easy to exceed. Some suboptimal solutions:

  • Upgrade to PowerPoint 2007, files are a lot smaller, but many of my (corporate) clients do not have this software yet, so you end up saving in the 2003 format anyway
  • Compress pictures: select the picture, in the format menu pick “compress” and select the appropriate DPI rate. I personally don’t use it a lot: it does not save that much space if you use larger images, and the quality of your source file deteriorates forever. A big issue, especially when putting your presentation on a big overhead screen.
  • Zipping files does not have a big impact when using images

What I end up doing is

  • Keep file sizes (and image quality) to the maximum
  • Use PDF files to exchange drafts with my clients
  • Finally, send the master file across using a file transfer utility such as YouSendIt.com (note that YouSendIt is not secure in its basic version, anyone “guessing” the URL can download the file).
·Design

Update

I have entered my usual summer blogger schedule (fewer posts) and am now working really hard to get SlideMagic 2.0 right. The feature list for SlideMagic 2.0 is now almost completely implemented. In software, there are always more things to add, but the product as it stands at the moment is starting to get very useful. Over the last 2 weeks I put in very big changes that might not look big from a user’s perspective, but required huge changes under the hood:

  • The new '“side title” layout (my preferred)
  • Slide search previews in your own preferred colour, layout, font style
  • Horizontal and vertical waterfall charts
  • Dynamically generated slides with a relevant image (i.e., unlimited slide in the template bank)
  • Better rendering of slides and images on higher resolution screens
  • Useful image compression in the background

The only big one that remains outstanding is a better way to make diagrams with lines and arrows, the connector solution is not perfect.

In the background I am now tweaking lots of user interface details: how borders fit around thumbs, mouse behaviour when hovering over things, an “endless scroll” is now working for image search, messages that warn you when things go wrong, or when your app is busy searching, making sure that thumbnails distribute nicely over the screen when zooming, minimising the times when the app needs to re-render a slide or image to make the workflow calmer, etc. etc.

I start to look at app design the way I look at slide design. Things need to be absolutely right, and even tiny deviations, irregularities, small mistakes, can really upset me, while most people won’t even notice them. This is what I think ultimately leads to good design, one by one, these details do not matter, I you add them all though, something works without you having an ability to point your finger at exactly why.

Continue reading →